
Using the information in the Site Survey form, all devices to be installed shall be provisioned by Guardian Property System (GPS) prior to the deployment. All pre-provisioned devices will have a label with the location of installation indicating that provisioning has been done. The Installer or customer can use the below provisioning process for the installation of extra Leak Detectors that have not been pre-provisioned. Gateways always need to be provisioned by GPS.
- WAKE the Leak Detector by using the activating tool or a damp paper towel on the top sensor. It will wake into JOIN mode (repeat LED flashing).
- Allow a few moments for handshake with a Gateway.
- Verify proper JOIN (2 beeps, followed by the LED turning OFF). If the Leak Detector is not accepted into the network within 5 minutes, it will enter SLEEP mode. Wake the device again to trigger a new JOIN attempt.
- On the GPS Dahbaord, navigate to the relevant Location and click on “Menu”. Choose “Add Device” (for leak detectors) or “Add Gateway” and scan the QR code on the Device label
- Supply the appropriate information and confirm:
If the device is a Gateway, name it according to naming convention defined here. If the device is a Leak Detector, name it as accurately as possible according to naming convention defined here. You can select any arbitrary option for “Device Use”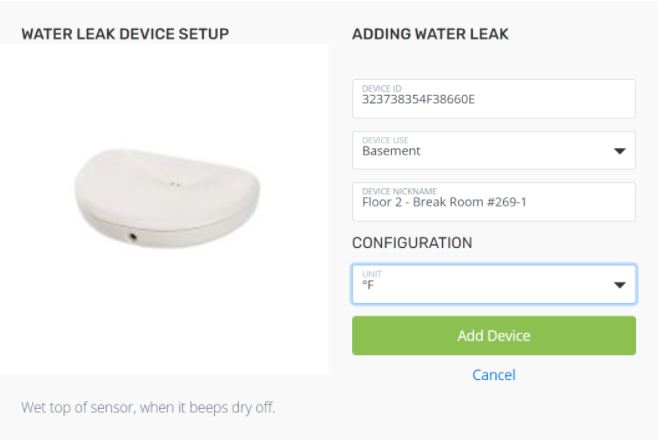
- After a few moments, refresh the main Dashboard page and verify Device connectivity as indicated by the checkmarks.
Linked YouTube video:
GPS Tutorial: Adding New Guardian Leak Detectors (Desktop)
GPS Tutorial: Adding New Guardian Leak Detectors (Mobile)
Comments
Article is closed for comments.